Category Archives: Ubuntu

Ubuntu Linux

Ubuntu Jaunty & ATI

This is quick’n’dirty writeup to help others who might have the same problem. I’ll clean this up later in the week …

Ubuntu Jaunty is the new beta version of Ubuntu. It comes with a new version of X.Org and the ATI drivers have been incompatible with this version of X.Org. ATI recently released drivers that support X.Org 1.6. If you have problems with X not starting follow the instructions here:
https://wiki.ubuntu.com/X/Troubleshooting/FglrxInteferesWithRadeonDriver

For me what happened is that X wouldn’t start properly and cause my Lenovo T400 to freeze and lock up. The laptop would boot but when X would start (when the login screen appears) I’d get a black screen with red lines at the top. To solve this I booted to runlevel 1, also known as failsafe mode. If your using a laptop with wireless, I suggest you connect directly to your router using a network cable, otherwise you may have to configure wireless manually (it’s not that hard).

When your system starts, select failsafe mode, on the next screen to appear choose the option to go to a “root shell with networking”.

Next remove the install ATI drivers and install from scratch the ones you need:

sudo apt-get remove –purge xorg-driver-fglrx xserver-xorg-video-ati xserver-xorg-video-radeon
sudo apt-get install xserver-xorg-video-ati
sudo apt-get install –reinstall libgl1-mesa-glx libgl1-mesa-dri
dpkg-reconfigure -phigh xserver-xorg

If this doens’t work for you see the Ubuntu page mentioned above.

Xen for Ubuntu Intrepid 8.10

I was in the process of figuring out and documenting the process of  compiling and installing an Xen enabled kernel on Ubuntu Intrepid 8.10. This was for a specific project that’s not going to come to fruition. I’m not going to bother as I also don’t feel like having my laptop burn a gaping hole through my lap as I wait for the kernel to compile, and well you know I still have some use for the 2 lads downstairs. And after years of compiling kernels, I really can think of more productive uses of my time.

The quickest way is to grab a Debian Xen enabled kernel, this isn’t recommended by Ubuntu and if your not comfortable hacking your system and having to compile modules (drivers in Windows speak) for hardware or proprietary hardware that Debian doesn’t include support for, then don’t even think of doing this and just use KVM.

Here’s how Chris did it for a system running a AMD64 processor, if you’ve an Intel processor you’ll need to use a different kernel:

http://www.chrisk.de/blog/2008/12/how-to-run-xen-in-ubuntu-intrepid-without-compiling-a-kernel-by-yourself/

If you want a later kernel (2.6.27 or 2.6.28) poke around:

http://kernel-archive.buildserver.net/

That’s the approach I’m going to use, as I know that if I’ve problems or issues I’ll be able to figure it out. Anyways, the start of the orignal draft is below, preceded by a minor rant. When I get around to getting Xen on Ubuntu to work with a Debian kernel I’ll add a new post here. Continue reading Xen for Ubuntu Intrepid 8.10

Php 5 on Ubuntu

This assumes that you want to use Php with Apache2 on Ubuntu 8.10 Intrepid.

First install libapache2-mod-php5:

sudo apt-get install libapache2-mod-php5

Which will install the following extra packages:

The following extra packages will be installed:
apache2-mpm-prefork php5-common
Suggested packages:
php-pear php5-timezonedb

And will remove apache2-mpm-worker (if you have it already installed).

The following packages will be REMOVED:
apache2-mpm-worker

This will install core Php packages, if you need others search for them:

apt-cache search php |more

And install what you need.

Enable mod_perl on Debian, Ubuntu, & Other Linuxes.

To enable mod_perl with Apache2 on Debian & Ubuntu for all directories served up by Apache2, including user directories such as ~/public_html, add the following lines to /etc/apache2/sites-available/default

# enable mod_perl
    <Files ~ ".(pl|cgi)$">
           SetHandler perl-script
           PerlResponseHandler ModPerl::Registry
           Options +ExecCGI
           PerlSendHeader On
    </Files>

In a real production environment you probably don’t want to enable this for all directories that Apache2 serves up, but only from those directories you expect to run perl in.

Thanks to this thread on the Ubuntu Forums for the info.

Titled updated as per Ozkar’s suggestion.

KDE4 and Debian

I figured it’s time for me to try and install kde4 again! Previously I had to remove KDE4 due to package conflicts. There are installation instructions at:

http://pkg-kde.alioth.debian.org/experimental.html

So following the instructions there on what changes to make to your sources.list, and then run:

aptitude update

I’ve had some dependency issues, and installing the kde4 package (a meta-package that will install all of KDE4) would not install due to dependency issues with the kdegraphics package. The way around this is to install the kde4-minimal package and whichever of the other packages you want. So I installed everything, minus the kdegraphics package via the following:

aptitude install -t experimental kde4-minimal kdeplasma-addons kdegames kdemultimedia kdenetwork kdepim kdeutils kdeedu kdeadmin kdeartwork kdetoy

Be prepared for a lot of packages to be installed, for others to be removed, and to possibly break your existing kde3 installation (if you have one). See the first comment to see what I had to install and remove.

Firstly, KDE4 does not import any of your KDE3 settings, which is pretty annoying, as all of the applications start with the default settings, and is really annoying with applications like kmail … however some has created a tool to import the settings:

http://silentcoder.co.za/silentcoder/?page_id=330

My only complaint about the tool, is that it requires root to install it. I’d also like the option to be able to run the tool without first having to install it. Anyways, it seems to work pretty well and imported all of my mail into kmail, the only thing it didn’t do was import account settings into kmail.

This post is a work in progress, I’ll update it over the next day or so with any further instructions as I install, configure, and test KDE4.

Debian’s e17 Packages

I thought I’d start looking at using Debian’s experimental E17 packages. I commented out all other E17 repo’s from my source.list and installed the debian e17 package. It installs a minimal amount of related packages, and there doesn’t seem to be lot of e17 packages available in the experimental repo

sudo aptitude install e17
Reading package lists… Done
Building dependency tree
Reading state information… Done
Reading extended state information
Initializing package states… Done
Reading task descriptions… Done
The following NEW packages will be installed:
e17 e17-data{a} libecore-con0{a} libecore-evas0{a} libecore-fb0{a} libecore-file0{a} libecore-imf0{a} libecore-ipc0{a} libecore-job0{a} libecore-txt0{a} libecore-x0{a} libecore0{a}
libedbus0{a} libedje0{a} libeet1{a} libefreet0{a} libembryo0{a} libevas-engines{a} libevas0{a}
0 packages upgraded, 19 newly installed, 0 to remove and 0 not upgraded.
Need to get 8110kB of archives. After unpacking 15.5MB will be used.

This appears to provide a good basic E17 Desktop, but provides no additional themes, and I’m not sure how many modules it includes. Here’s a screenshot:
Default Debian E17 Install

If you want to use this add the following to your /etc/apt/sources.list:

deb http://ftp.us.debian.org/debian/ experimental main non-free contrib

This also includes KDE4 packages. You’ll want to be careful with this repo, that you don’t pull in and install too many (possibly breaking) packages from it.

Look for my latest posting on E17 as this information could be out-of-date:

http://timony.com/mickzblog/category/e17/

Lenovo Laptop?

I’m thinking of getting a new laptop either the Lenova ThinkPad T400 (which is a replacement for the T61), or the IdeaPad U330 to replace my aging Dell 700m

The big thing for me is do they work with Linux (for me specifically Debian or Ubuntu).

For anyone interested in either laptop, looks like the the U330 works (near) flawlessly with Ubuntu. See this posting on this thread for an enthusiastic comment:

http://ubuntuforums.org/showpost.php?p=5741753&postcount=5

And with the T400 you’ll have some work to get everything working smoothy. Such as the dual-graphics cards which is how Lenovo get’s up to 10 hours of battery life from the T400.

However, if you don’t mind using breaking stuff, the new Beta version of Ubuntu appears to work reasonably well on the T400. See this blog posting and this thead on Lenova’s forums for more details.

I’m torn between either, the small size of the U330, versus the better battery life of the T400 (and the fact that both are a weeeeee bit dear).

OK, I’m tired as I write this, and I find sometimes when I “blog while tired” that my grammar/spelling/ability to make sense suffers, so maybe I’ll rewrite this in the morning. 🙂

e17 on Ubuntu Revisited

Ever since my original post on installing Enlightenment E17 on Debian and Ubuntu things have changed, such as the server that hosted the package repositories for both Debian & Ubuntu going off-line (supposedly temporarily but it’s been offline for almost 6 months).

Also, I’ve been having issues with E17 working correctly on my laptop running Ubuntu. This is probably because of conflicts between old and new packages, and because E17 is still beta code.

In this posting I’ll concentrate on installing or reinstalling E17 on Ubuntu 8.04 otherwise know as Hardy Heron. You should be able to use the same instructions to install E17 on other recent versions of Ubuntu. I’ll also try and the same for installing E17 on Debian at some point in the future.

First, remove all existing traces of any previous E17 installs.

sudo apt-get remove --purge e17 emodule* libevas* libefreet*

You’ll notice that I’ll use a mixture of apt-get and aptitude to remove and install packages. I’ve found that sometimes aptitude is a little too aggressive in removing packages, and sometime will remove package that I need. For instance when I started to remove E17, aptitude also wanted to remove xserver-xorg which would mean X wouldn’t work (no GUI).

Next, remove any old repositories for E17 from you sources.list. But, first make a back-up copy of the file:

sudo cp /etc/apt/sources.list /etc/apt/sources.list.bak

Then, remove or comment out any other E17 repositories from the file, by editing the file with your favourite text editor. I normally use emacs:

sudo emacs /etc/apt/sources.list

Or if you don’t have X running and are doing this from a console:

sudo emacs -nw /etc/apt/sources.list

You can use # to comment out lines. Remove any references to edevelop.org or soulmachine.net .

Then, add the dunnewinde.net repository, by adding the following lines:

# dunnewind e17 repository for Ubuntu Hardy
deb http://e17.dunnewind.net/ubuntu hardy e17

You can replace hardy with either gutsy or feisty if your running either of those versions of Ubuntu.

Now your ready to install/reinstall Enlightenment E17! 🙂

sudo aptitude install e17

Or if you also want to play with a media player based on E17 libraries install eclair also.

sudo aptitude install e17 eclair


Once the install is completed, logout. At the login screen (GDM) change your session to Enlightenment and login and you should see something that looks like the following:

Sorry that screenshot is missing. I deleted it as someone was leeching the image by linking directly to the image from their blog (using up my bandwidth instead of theirs). I’ll upload a new image in the near future.

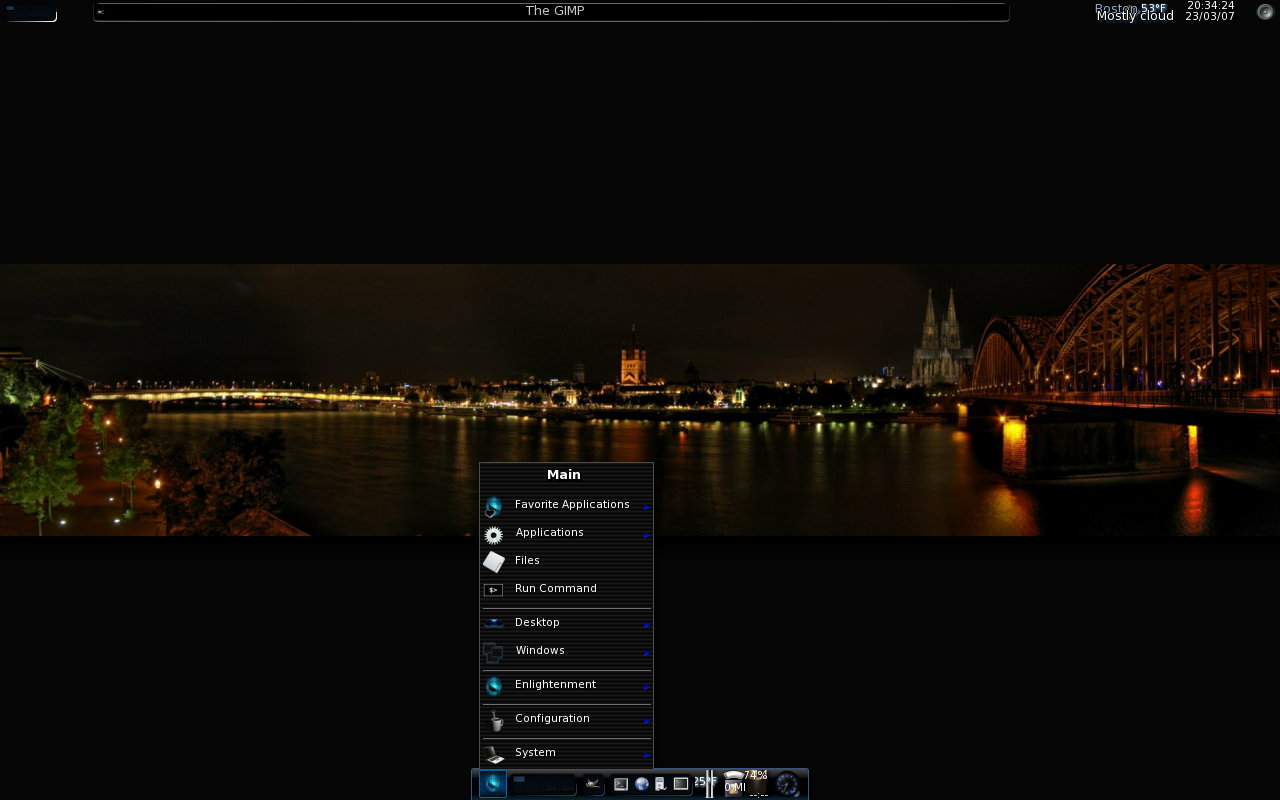
No other themes are installed, I’ll write another post in the next few days showing how to get themes from get-e.org and install them. In the meantime here’s a screen-shot using the Darkness theme:
This posting originally at:

http://timony.com/mickzblog/2008/04/15/e17-on-ubuntu-revisitede17-on-ubuntu-revisited/